Run it on Kubernetes
Run strazad on a throwaway kind cluster through the Helm chart, sign in through a port-forward, and read one deny with its reason.
- Who
- You, as the admin
- Where
- Two terminals and a browser, on a machine with Docker
- Profile
- Standalone
On this page
You run strazad on a throwaway Kubernetes cluster on your own machine through the Helm chart, and work as its admin from two terminals and a browser. You sign in through a port-forward and ask the server what it decides for rm -rf. At the end you have read one deny with its reason, and you delete the cluster.
The chart runs in its standalone profile here: one pod with an embedded database, an embedded event broker and the built-in sign-in page. No external service stands between you and the first decision.
Before you start
- Docker Engine, kind, kubectl and Helm.
- A clone of the repository, because the commands read the chart from
deploy/helm/straza. strazactlon your PATH, from Install.
The chart pulls the release image ghcr.io/strazahq/straza by default, and building your own image from the repository is an optional section below. One terminal is enough for everything except the port-forward, which holds a second one.
Check the tools
CLI onlyThe cluster and the chart are terminal work. The console opens once the server runs.
kind runs a whole Kubernetes node as one Docker container, so Docker is the only service that has to be running before you start. Confirm that the four tools answer.
docker version --format 'Docker Engine {{.Server.Version}}'
kind version
kubectl version --client
helm version --short
Docker Engine 29.4.0 kind v0.33.0 go1.26.7 linux/amd64 Client Version: v1.37.0 Kustomize Version: v5.8.1 v3.16.4+g7877b45These are the versions this page was tested with. kind and kubectl are single static binaries from their release pages, and each page publishes a SHA-256 file to check the download against. The cluster needs about 1.5 GB of disk for the node image and the server image together, and the node and the pod together use about 600 MB of memory.
Start the cluster
Create the cluster. kind pulls its node image the first time and starts one container that runs the control plane.
kind create cluster --name straza
kubectl get nodes
You should see
The node
straza-control-planewith the statusReady.Creating cluster "straza" ... ✓ Ensuring node image (kindest/node:v1.37.0) 🖼 ✓ Preparing nodes 📦 ✓ Writing configuration 📜 ✓ Starting control-plane 🕹️ ✓ Installing CNI 🔌 ✓ Installing StorageClass 💾 Set kubectl context to "kind-straza" NAME STATUS ROLES AGE VERSION straza-control-plane Ready control-plane 30s v1.37.0The in-progress lines and kind’s closing hints are trimmed.
kind create clusteralso writes the contextkind-strazainto your kubeconfig and selects it, which is why thekubectlcommands below name no cluster.
Optional: build your own image
Skip this section if you use the release image. If you run Straza from source, build the server image from the repository root with the version git describes, so the pod reports the same version the binaries from Install would.
STRAZA_VERSION=$(git describe --tags --always)
docker build -f deploy/Dockerfile --build-arg VERSION=$STRAZA_VERSION --build-arg COMMIT=$(git rev-parse --short HEAD) -t straza:$STRAZA_VERSION .
Docker prints the build steps, and the Go compile takes the longest. Without the two build arguments the pod would report the version dev. The finished image is about 120 MB.
The Dockerfile has two stages. A Go 1.26 image compiles strazad and strazactl with CGO off. The final image is built from scratch and holds the two static binaries, the CA bundle and the license and notice files under /licenses/, running as user 65532 with the data directory set to /var/lib/straza. The .dockerignore file at the repository root keeps local state such as bin and the tool caches out of the build context, so the context is the source tree alone.
Hand the image to the cluster, because a kind node cannot see your machine’s image store.
kind load docker-image straza:$STRAZA_VERSION --name strazaYou should see
kind reports that the image is not yet present on the node straza-control-plane, and loads it.
The load copies the image into the node’s own image store. That is what lets the chart run it with a pull policy of Never, because nothing on the node ever asks a registry for it. Add three values to the install command of the next section so the chart uses it: --set image.repository=straza --set image.tag=$STRAZA_VERSION --set image.pullPolicy=Never.
Install the chart
The chart’s defaults describe the enterprise shape: two replicas, a bundled Postgres, a bundled NATS and an external identity provider. Three values turn it into the one-pod standalone shape of this tutorial. The image is
ghcr.io/strazahq/strazaat the chart’s appVersion, which is 1.1.0 for this release.helm install straza deploy/helm/straza \ --set profile=standalone --set replicaCount=1 \ --set publicUrl=http://127.0.0.1:18420 \ --wait --timeout 3mYou should see
The release status
deployed, followed by the chart’s notes. They name the releasestraza-straza, the imageghcr.io/strazahq/straza:1.1.0or your own tag, the profilestandalone, one replica, the public addresshttp://127.0.0.1:18420, embedded per-pod events and a per-pod SQLite store.Each value has a reason:
Value Why profile=standaloneSelects the embedded store and broker, and drops the bundled backends, which the chart renders only under the enterprise profile. replicaCount=1Has to go with the standalone profile. The chart refuses to render a standalone release with more than one replica, because each pod would own its own SQLite file. publicUrlThe address your clients dial. It becomes the issuer inside every session token and the base of every link the server hands out, including the sign-in address the login command prints in a moment, so it has to be the port-forward address you open next. Left empty, the chart derives the in-cluster Service name http://straza-straza.default.svc:8420, which is right for clients inside the cluster and unreachable from your browser.--waitreturns once the pod passes its readiness probe. Check the pod:kubectl get podsNAME READY STATUS RESTARTS AGE straza-straza-78467cff98-tfqx6 1/1 Running 0 22sYou should see
One pod,
1/1ready, with the statusRunning.If this fails
ImagePullBackOff- The node could not pull the release image.
kubectl describe pod -l app.kubernetes.io/name=strazaends with the registry’s reply, and the tag and the node’s network access are the two things to check. ErrImageNeverPull- The pod’s events say the image “is not present with pull policy of Never”, so the load of your own image did not reach this cluster. Run
kind load docker-imageagain with the same--name, then delete the pod withkubectl delete pod -l app.kubernetes.io/name=straza, and the Deployment replaces it.
The first boot happened inside the pod, so its log is where the one-time passwords went. Read them now.
kubectl logs deploy/straza-strazaYou should see
One line with the password of
adminand one with the password ofbreak-glass, and astrazad servingline for the profile standalone athttp://127.0.0.1:18420.Copy the admin password from your own log
Each password is printed once. You sign in with the admin one in a moment.
The pod’s data directory
/var/lib/strazais an emptyDir. It holds the SQLite file, the embedded broker’s store and the approver certificate the standalone profile mints for itself. The store and the admin you are about to use therefore exist exactly as long as this pod does. That is the right shape for a throwaway cluster and the wrong one for anything you intend to keep, which is why the production shape on Kubernetes with Helm puts the store in Postgres and the events in NATS.Reach the server through a port-forward
CLI onlyThe port-forward runs in a terminal in both forms. The console needs it too.
The Service is a ClusterIP, so nothing outside the cluster reaches it until you forward a port. In a second terminal, forward local port 18420 to the Service and leave it running.
kubectl port-forward svc/straza-straza 18420:8420Forwarding from 127.0.0.1:18420 -> 8420 Forwarding from [::1]:18420 -> 8420The local port is 18420 rather than the server’s own 8420, so that a standalone server already listening on 8420 on your machine, from the first tutorial for example, is never mistaken for this one. The address has to match the
publicUrlyou set at install. Back in the first terminal, ask the server what it is and whether it is ready.curl -s http://127.0.0.1:18420/version curl -s http://127.0.0.1:18420/readyzThe first answer is one line of JSON. Its
versionis the one in the image, and itsprofileisstandalone. Itsapproverblock describes a second listener that the standalone profile mints for phone approval at the pod’s own IP. The chart publishes no port for it, so nothing outside the cluster reaches it, and this tutorial does not use it. The second answer says the pod is ready:{"status":"ok","components":{"bus":"ok","store":"ok"}}Sign in
Open
http://127.0.0.1:18420/console/in your browser and press Sign in with a code. The console shows a one-time code.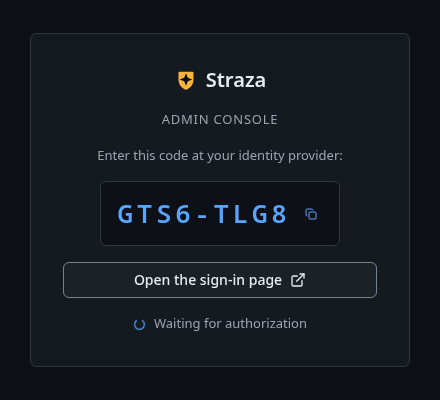
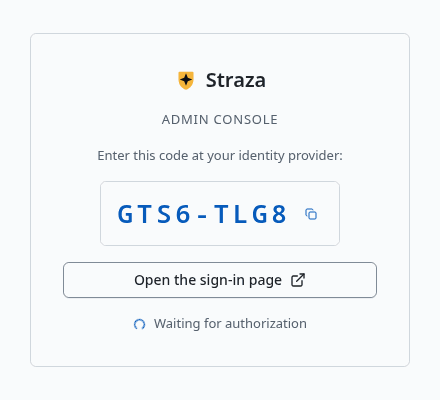
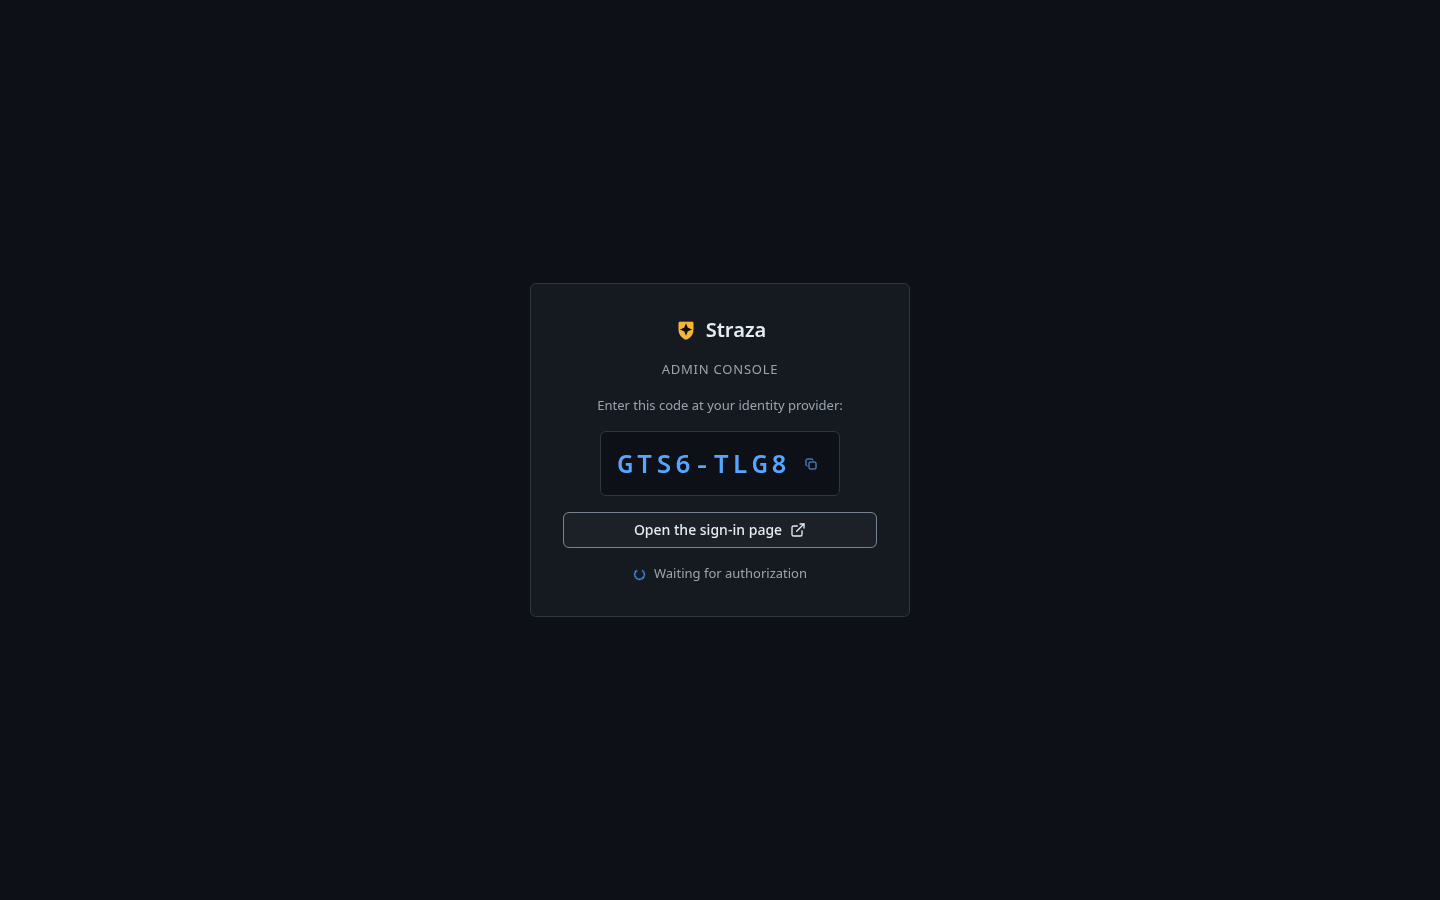
Press Open the sign-in page. Your code is different. Show the whole screen - Press Open the sign-in page. A new tab opens on the page titled Sign in to Straza, with the code filled in.
- Check that the code matches, enter
adminand the password from the pod log, and press Sign in. - The tab says Signed in. You can close this tab. Go back to the console.
You should see
The console opens on Overview. The foot of the sidebar says
standaloneand the server’s build.Log in.
loginis the one command that takes the server address, and it remembers it for every later command.strazactl login --server http://127.0.0.1:18420Open http://127.0.0.1:18420/oidc/device?user_code=5FN6-5GP8 and confirm code 5FN6-5GP8 Logged in as admin. note: this login can change Straza's configuration. Keep it away from coding agents. Automation uses an admin API token in STRAZA_API_TOKEN, and an agent proposes config changes through the built-in straza MCP server.Between the second and the third line the command waits for you.
- Open the printed address in a browser. The page titled Sign in to Straza shows the code already filled in.
- Enter
adminand the password from the pod log, and press Sign in. The page answers “Signed in” and says you can close the tab. - Go back to the terminal.
You should see
Logged in as admin.and a note that asks you to keep this login away from coding agents.The address of the sign-in page is the
publicUrlfrom the install, and that is the reason the value had to be the port-forward address.If this fails
- An address at
straza-straza.default.svc - The release was installed without
publicUrl, and a browser on your machine cannot resolve that name. Runhelm uninstall strazaand run the install block again with the value. Then read the new admin password from the new pod’s log, because the data directory went away with the old pod. login timed out (device code expired)- More than ten minutes passed before you approved the code. Run the command again and approve the code it prints this time.
Read the deny
Now ask the server what it would decide for a command, before any agent is enrolled. Neither form runs the command or records anything.
- Policies
- standalone-starter
- Test a call
- Under Who, pick
admin. The starter policy applies to everyone, so the admin can stand in for the person who calls. - Pick Shell command, type
rm -rf /tmp/xin The command line, and press Test.
You should see
Denied, decided by rule
block-recursive-deletein policystandalone-starter, with the rule’s reason.strazactl policy simulate --roles dev --tool shell.exec --command 'rm -rf /tmp/x'This call would be denied. Decided by rule block-recursive-delete in policy standalone-starter: Straza starter policy: recursive force-delete is denied. Delete files individually, or an admin can edit the standalone-starter PolicySet. Simulated against the policies live right now, your file included if you passed one. This is today's answer, not a replay of any past decision. subject roles dev · attestation none snapshot 705a13b9b35902f8295ee4126287d2c84de8afb01674fd6592ac14544adfe539 (live) wire effect=deny · ruleId=block-recursive-delete · setName=standalone-starter · snapshot=705a13b9 note this verdict applies once this snapshot reaches the client; straza doctor proves a client is governedYou should see
This call would be denied.and the ruleblock-recursive-deletein policystandalone-starter.The rule applies to everyone, so the role
devneeds no definition for the answer to come back. The same command withgit statusanswers “This call would be allowed.” and names the profile default as the reason, since no rule mentions it. The snapshot id names the exact policy state that decided. A governed client downloads that same compiled snapshot and decides against it locally, which is what the note at the end of the answer means.The rule belongs to the starter PolicySet that a fresh standalone store seeds at its first boot, the one Your first governed session showed in full.
Delete the cluster
CLI onlyThe cluster goes away from a terminal.
Stop the port-forward in the second terminal with Ctrl-C, then remove the release and the cluster.
helm uninstall straza
kind delete cluster --name straza
release "straza" uninstalled Deleting cluster "straza" ... Deleted nodes: ["straza-control-plane"]If you built your own image,
docker rmi straza:$STRAZA_VERSIONremoves it from your machine as well.The uninstall removes the Deployment and the Service and, with the pod, the emptyDir that held the store, so nothing of this server survives it. The cluster deletion stops and removes the node container, and drops the
kind-strazacontext from your kubeconfig.Three things stay in Docker afterwards:
What stays Size How to remove it The node image kindest/node:v1.37.0, which the nextkind create clusterreuses1.34 GB docker rmiwith its image id, since kind pulls it by digest and leaves it untaggedThe build cache of the optional image build about 3.2 GB docker builder prunekind’s Docker network named kinddocker network rm kind
Next
- Kubernetes with Helm is the production shape on a cluster you keep, with Postgres and NATS behind the pods and your identity provider in front.
- What just happened names each piece that acted here.
Walked on v1.1.0-117-g106081a8 on 2026-10-06. A Linux host with Helm 3.16.4 and no Kubernetes cluster, so the cluster, the image build and load, the install, the pod checks, the port-forward and the teardown were not run, and their pasted outputs come from the kind walk of 2026-09-19 at v1.0.0-1235-ge8f5cdea. The install's values and the chart's notes were rendered with helm template from chart 1.1.0, and the version and readiness checks, the login with the form post the sign-in page sends and the simulated deny ran against a standalone strazad in an Alpine 3.20 container. The console steps were not clicked. Console screenshots show strazad v1.1.0-117-g106081a8, standalone.